
The purpose of this lab is to configure two Linux virtual machines (VMs in VirtualBox) so they can communicate with each other and share files over a network. This lab demonstrates basic virtual networking, IP connectivity, and file sharing using secure and network-based methods.
Environment
- Hypervisor – Oracle VirtualBox
- Operating System – Linux (Ubuntu/Debian-based)
- Number of Virtual Machines – 2
- Network Mode – NAT Network
- File Sharing Methods – SCP and NFS
Network Configuration
I powered off both virtual machines and configured their network settings in VirtualBox. For each VM, I navigated to Settings > Network > Adapter 1 and set the adapter to ‘NAT Network’. I ensured both VMs were connected to the same NAT Network so they could communicate with each other.
Verifying Network Connectivity
On each virtual machine, I identified the assigned IP address using the following command:
ip aThe IP addresses assigned were:
- VM1 “Alpha” – 10.0.2.4
- VM2 “Beta” – 10.0.2.5
To verify connectivity, I sent ICMP packets from VM1 to VM2:
ping 10.0.2.5The successful responses confirmed that the virtual machines could communicate over the network.
Method 1: File Sharing Using SCP (Secure Copy)
Installing and Enabling SSH
I installed and enabled the SSH service on both virtual machines using:
sudo apt updatesudo apt install openssh-server -ysudo systemctl enable --now sshTransferring Files
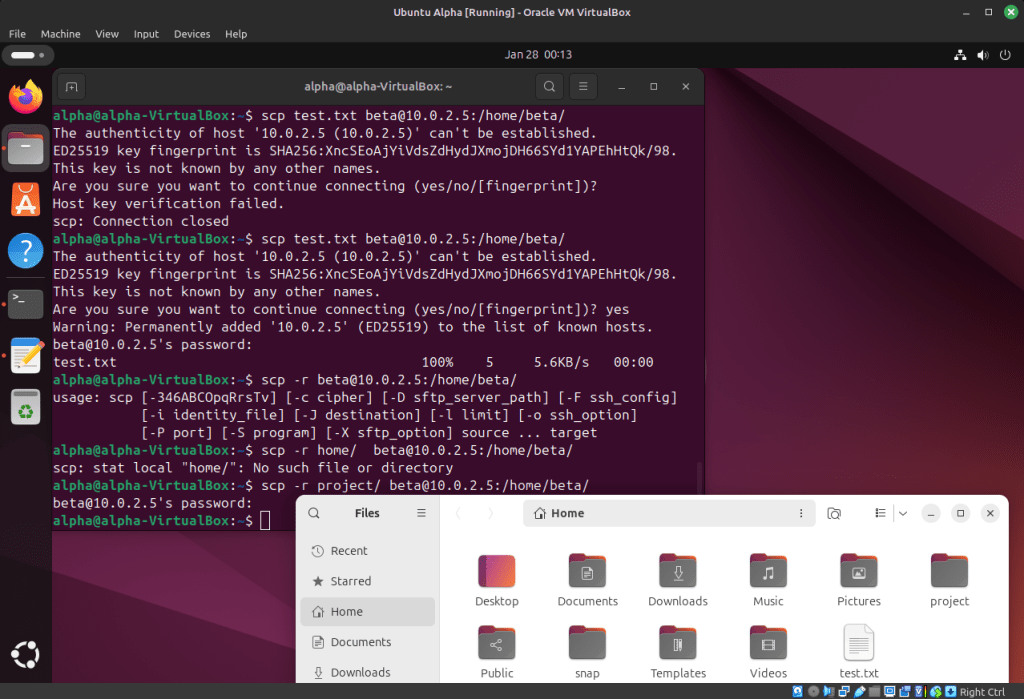
From VM1, I transferred a test file to VM2 using SCP:
scp test.txt beta@10.0.2.5:/home/beta/I also tested copying an entire directory:
scp -r project/ beta@10.0.2.5:/home/beta/Result
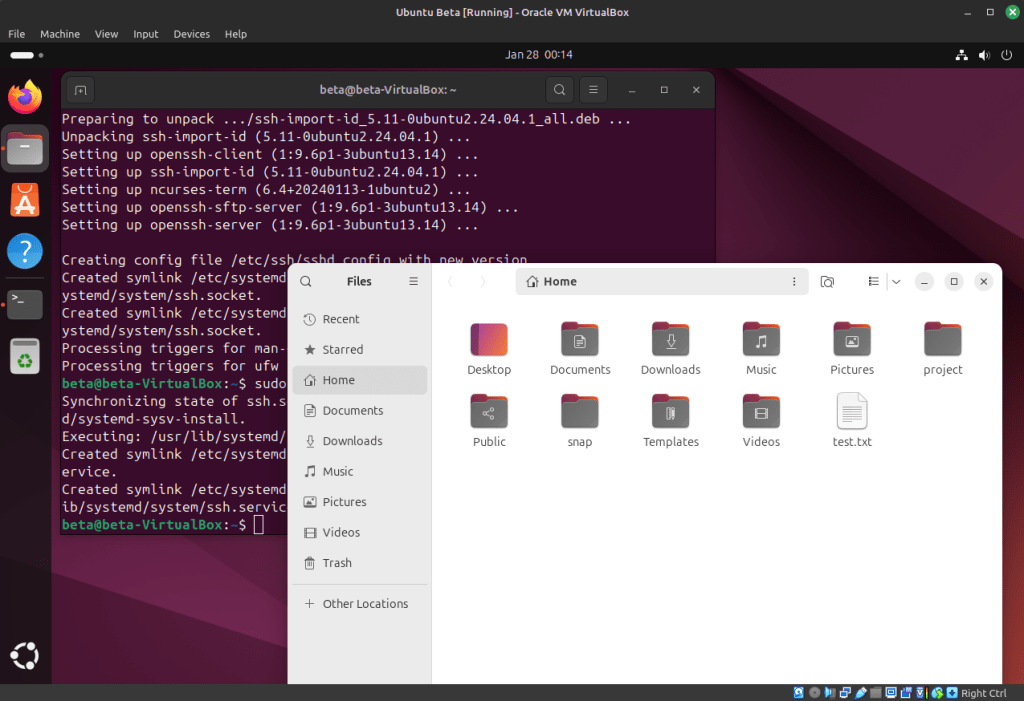
The files were transferred successfully, confirming that SCP was functioning correctly between the two virtual machines.
Alpha (VM1):
Beta (VM2):
Method 2: File Sharing Using NFS (Network File System)
Configuring the NFS Server (VM1)
I installed the NFS server package on VM1:
sudo apt install nfs-kernel-server -yI then created a shared directory and set appropriate permissions:
sudo mkdir /sharedsudo chmod 777 /sharedNext, I configured the NFS exports file:
sudo nano /etc/exportsI added the following entry to allow access from the NAT network:
/shared 10.0.2.0/24(rw,sync,no_subtree_check)Finally, I applied the configuration and restarted the NFS service:
sudo exportfs -asudo systemctl restart nfs-kernel-serverConfiguring the NFS Client (VM2)
On VM2, I installed the NFS client utilities:
sudo apt install nfs-common -yI created a mount point for the shared directory:
sudo mkdir /mnt/sharedI mounted the NFS share from VM1:
sudo mount 10.0.2.4:/shared /mnt/sharedTo verify functionality, I created a test file in the shared directory:
touch /mnt/shared/testfile.txtResult
The test file created on VM2 appeared in the shared directory on VM1, confirming that the NFS share was working correctly.
Verification
I verified successful completion of the lab by confirming:
- Network connectivity using ping between both virtual machines
- Successful file transfers using SCP
- Successful file creation and access through the NFS-mounted directory
Troubleshooting Notes
During the lab, I noted that using NAT Network instead of standard NAT was required for VM-to-VM communication. I also ensured that the SSH service was running for SCP to function and that the correct subnet was specified in the NFS exports configuration.
Conclusion
In this lab, I successfully configured two Linux virtual machines in VirtualBox to communicate and share files. I used SCP for secure file transfers and NFS for persistent file sharing. This lab reinforced my understanding of Linux networking, remote access, and file sharing concepts commonly used in real-world IT environments.
